Low-Calorie

Tuna Poke

Another post by popular request! I have been making my own poke (po-kay) now for about 6 months or so. Once I found out how easy it was I was hooked. And I do it on a budget without losing flavor! I have adapted my own version from several recipes online, but my main inspiration came from Jimmy Buffet’s book, Margaritaville The Cookbook. You can purchase your favorite sushi-grade tuna where you choose but I have purchased mine from either Aldi (12 oz. bag with 2-3 steaks in the freezer section) or from BJs Wholesale Club (Priced by weight, also frozen section). Both are equally excellent choices.

I try to cut the tuna same day I am using to keep it as fresh as possible. So when defrosting in fridge you can cut it into cubes (1/2″ or so) when it is still slightly frozen. This makes it easier to cut. But cutting it thawed is fine also. Just use a very sharp knife. I always try to keep a bag of frozen steaks in my freezer for when the poke craving hits.

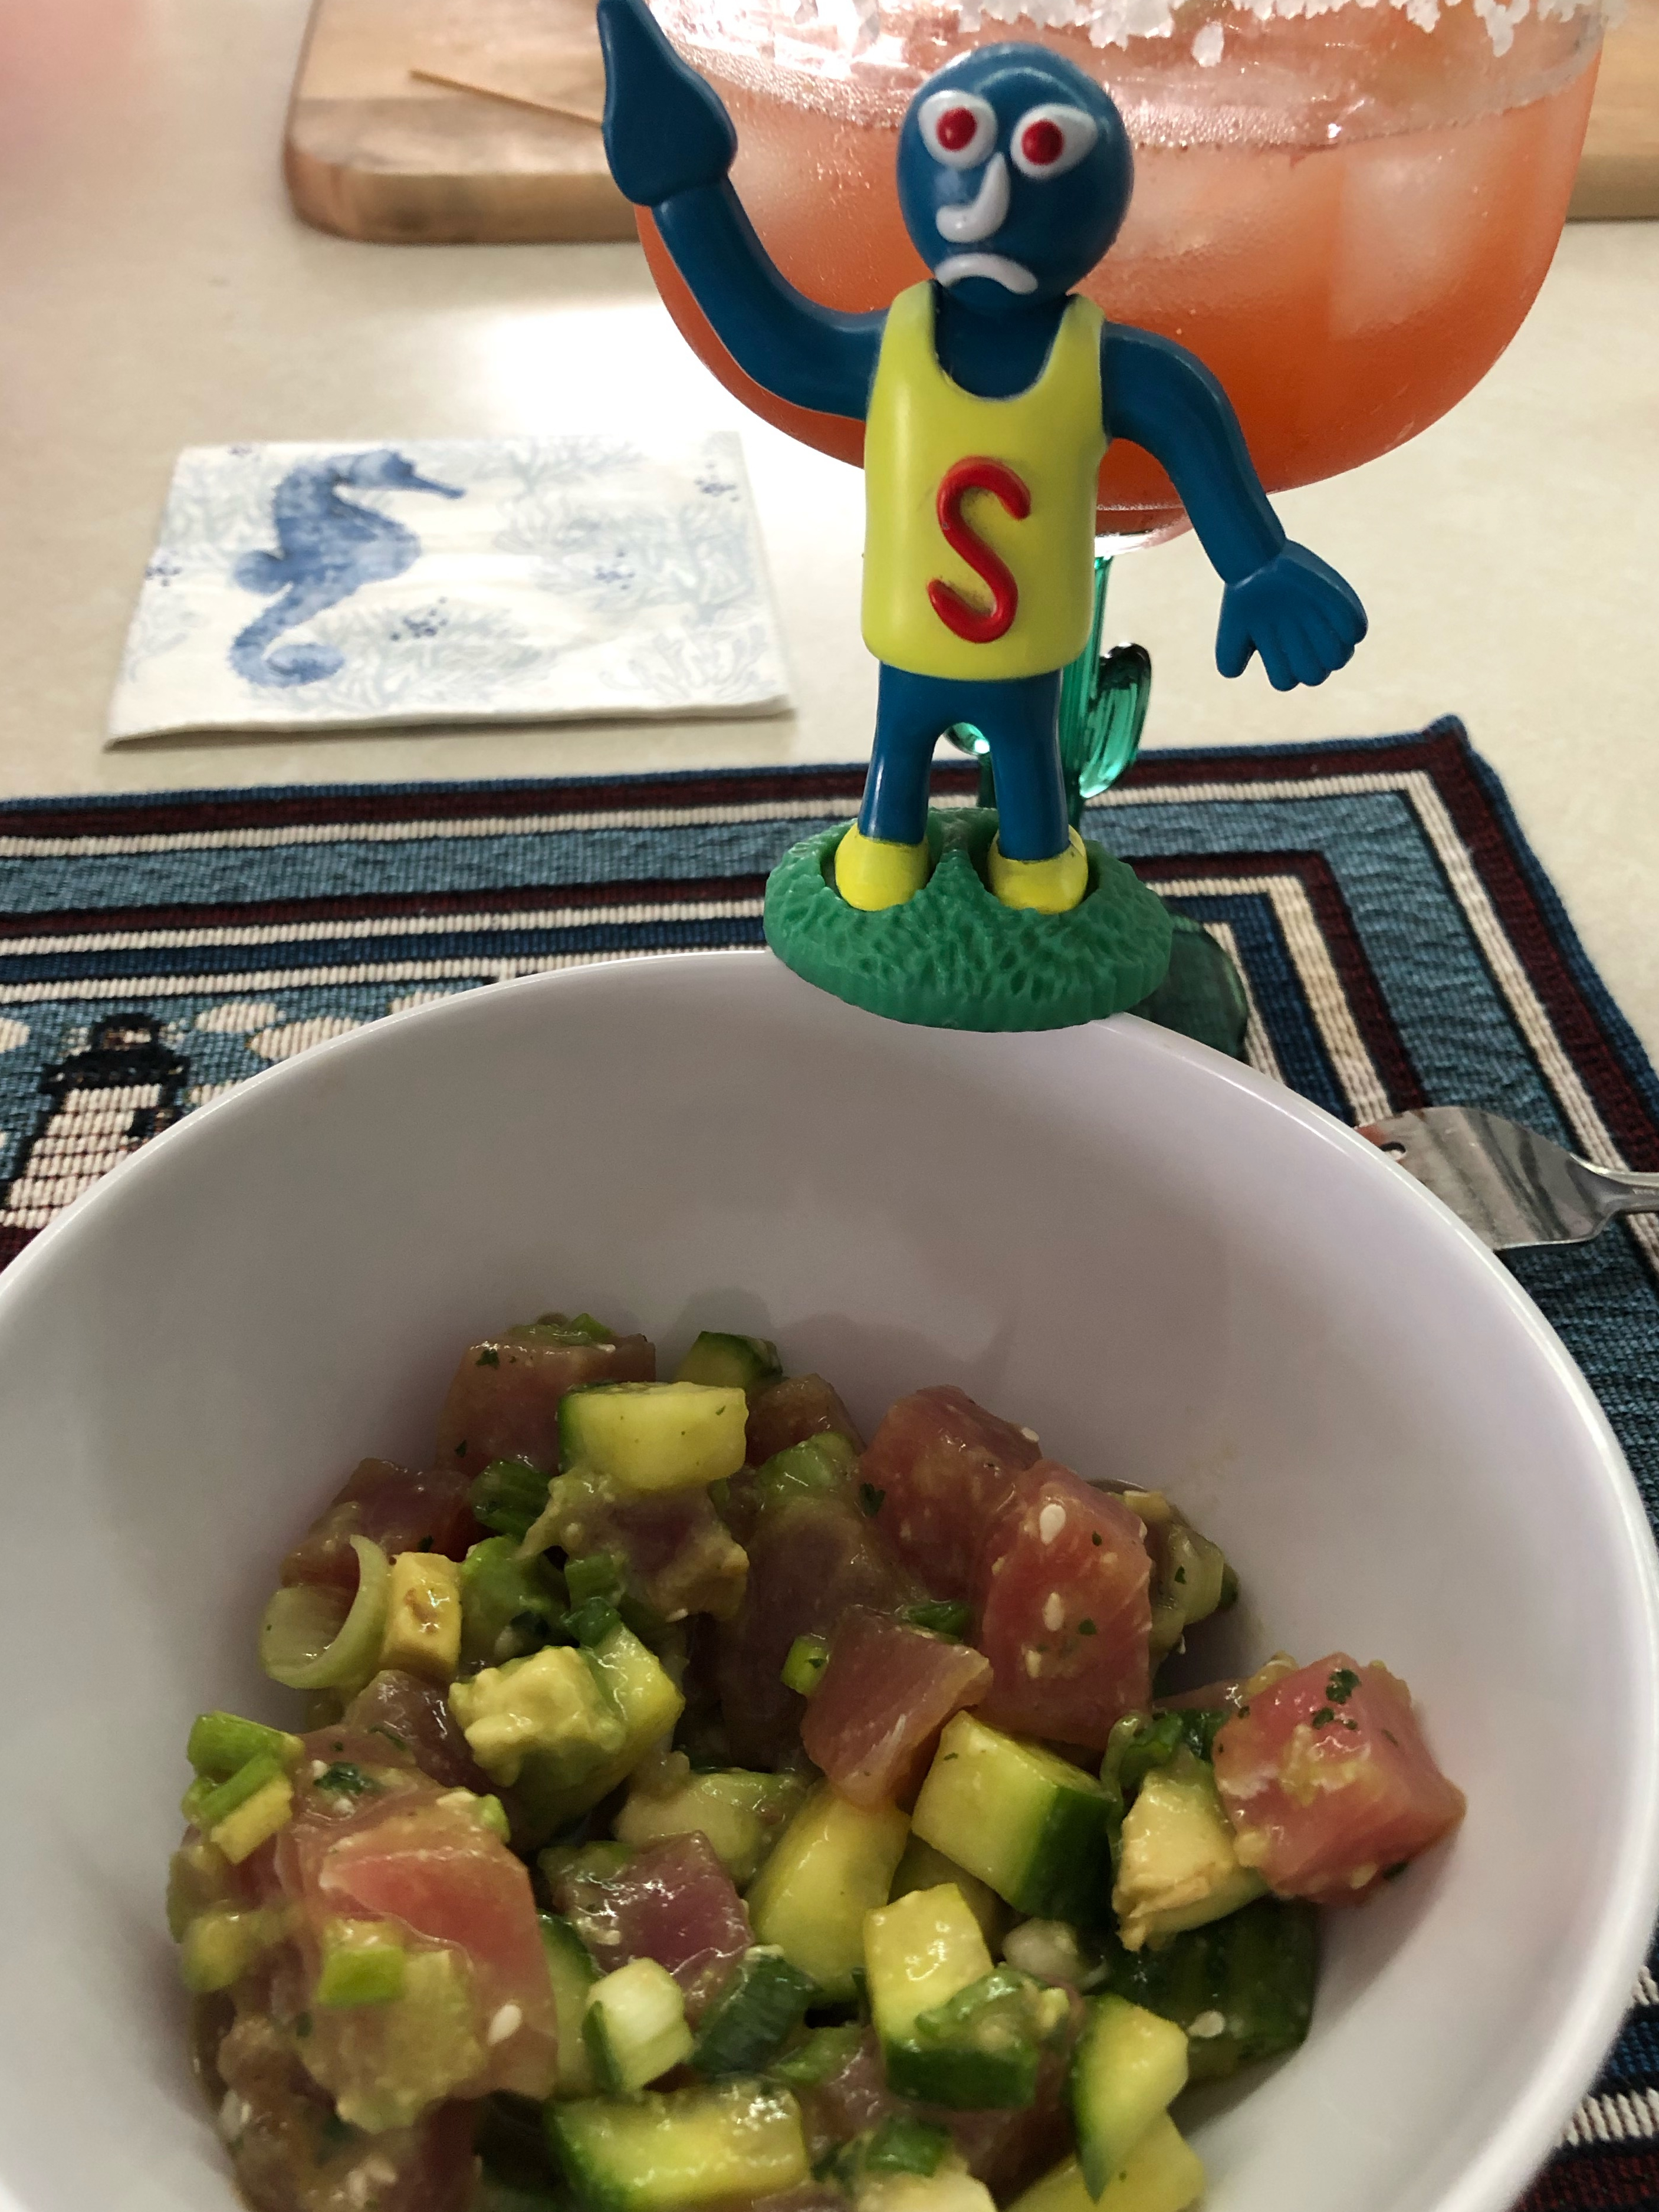
The last time I made it I added a new variation on it and added cooked shrimp. Phenomenal. My guests were not disappointed! The poke can be served as is, or with tortilla chips or my favorite, Pineapple-coconut Jasmine Brown Rice. I will post recipe for that soon.

This is best eaten same day obviously, but it will last 1 more day, sometimes 2, just remember it won’t look as vibrant as day 1. But it will still taste great! And this is such a low calorie, guilt free recipe you’ll love making it over and over! No cooking involved!
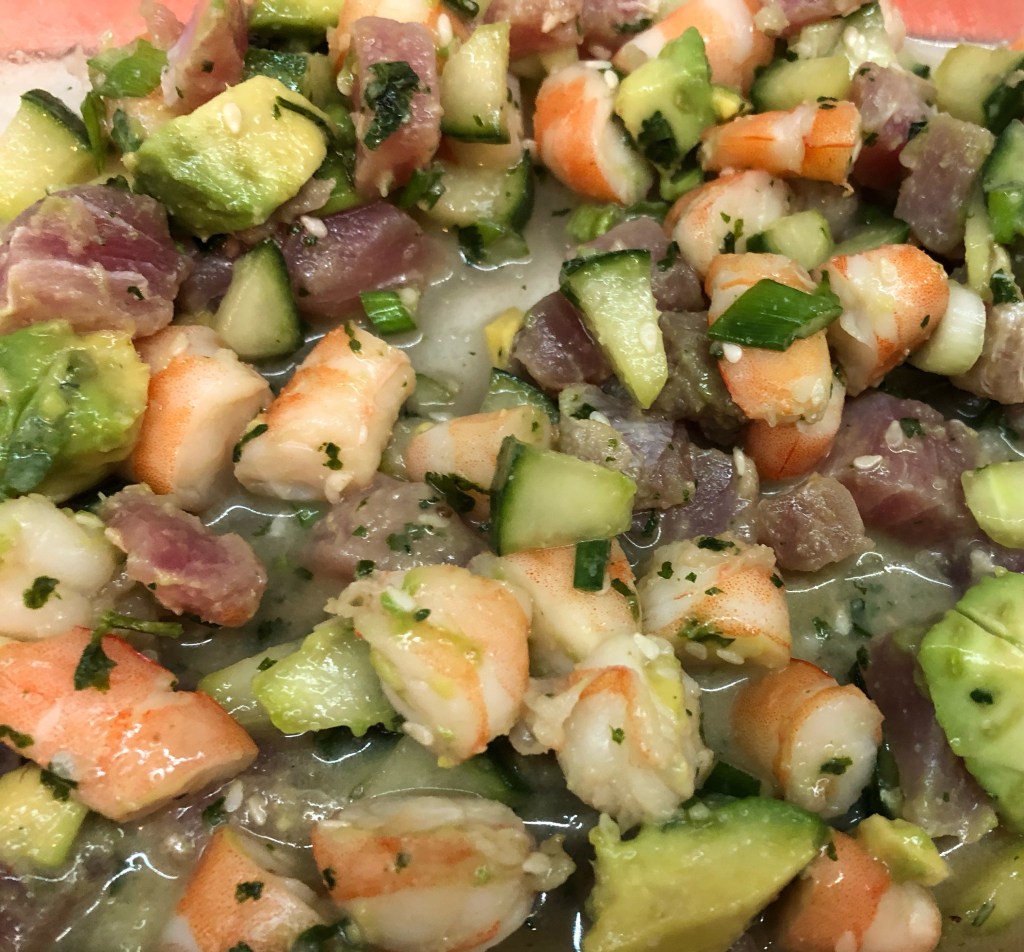
Ingredients:

12-16 ounces fresh/frozen sushi-grade ahi tuna

6 scallions, thinly sliced

1 garlic clove, minced

1/4 cup minced fresh ginger (this is key that it is fresh)

1/4-1/2 medium cucumber, seeded and diced small (English style cucumbers work best)

large handful fresh Cilantro leaves, minced (or about 1 TBS dried)

2 tablespoons fresh orange juice (best if from actual orange and not juice from a container)

1 1/2 TBS ponzu or teriyaki sauce (I will include my own sugar-free teriyaki recipe below)

1 1/2 tsp toasted sesame oil

1 1/2 tsp honey or agave (both work fine)

1 tsp wasabi paste (not absolutely necessary if you don’t want it)

1 tsp or more kosher salt

1 ripe avocado, pitted, peeled and diced. (Ripe but not TOO soft, better if a little firm)

1 TBS fresh lime juice (again fresh is best)

2 tsp toasted or un-toasted sesame seeds (can use white or black or both)

1/2 lb cooked chopped shrimp if desired

Directions:

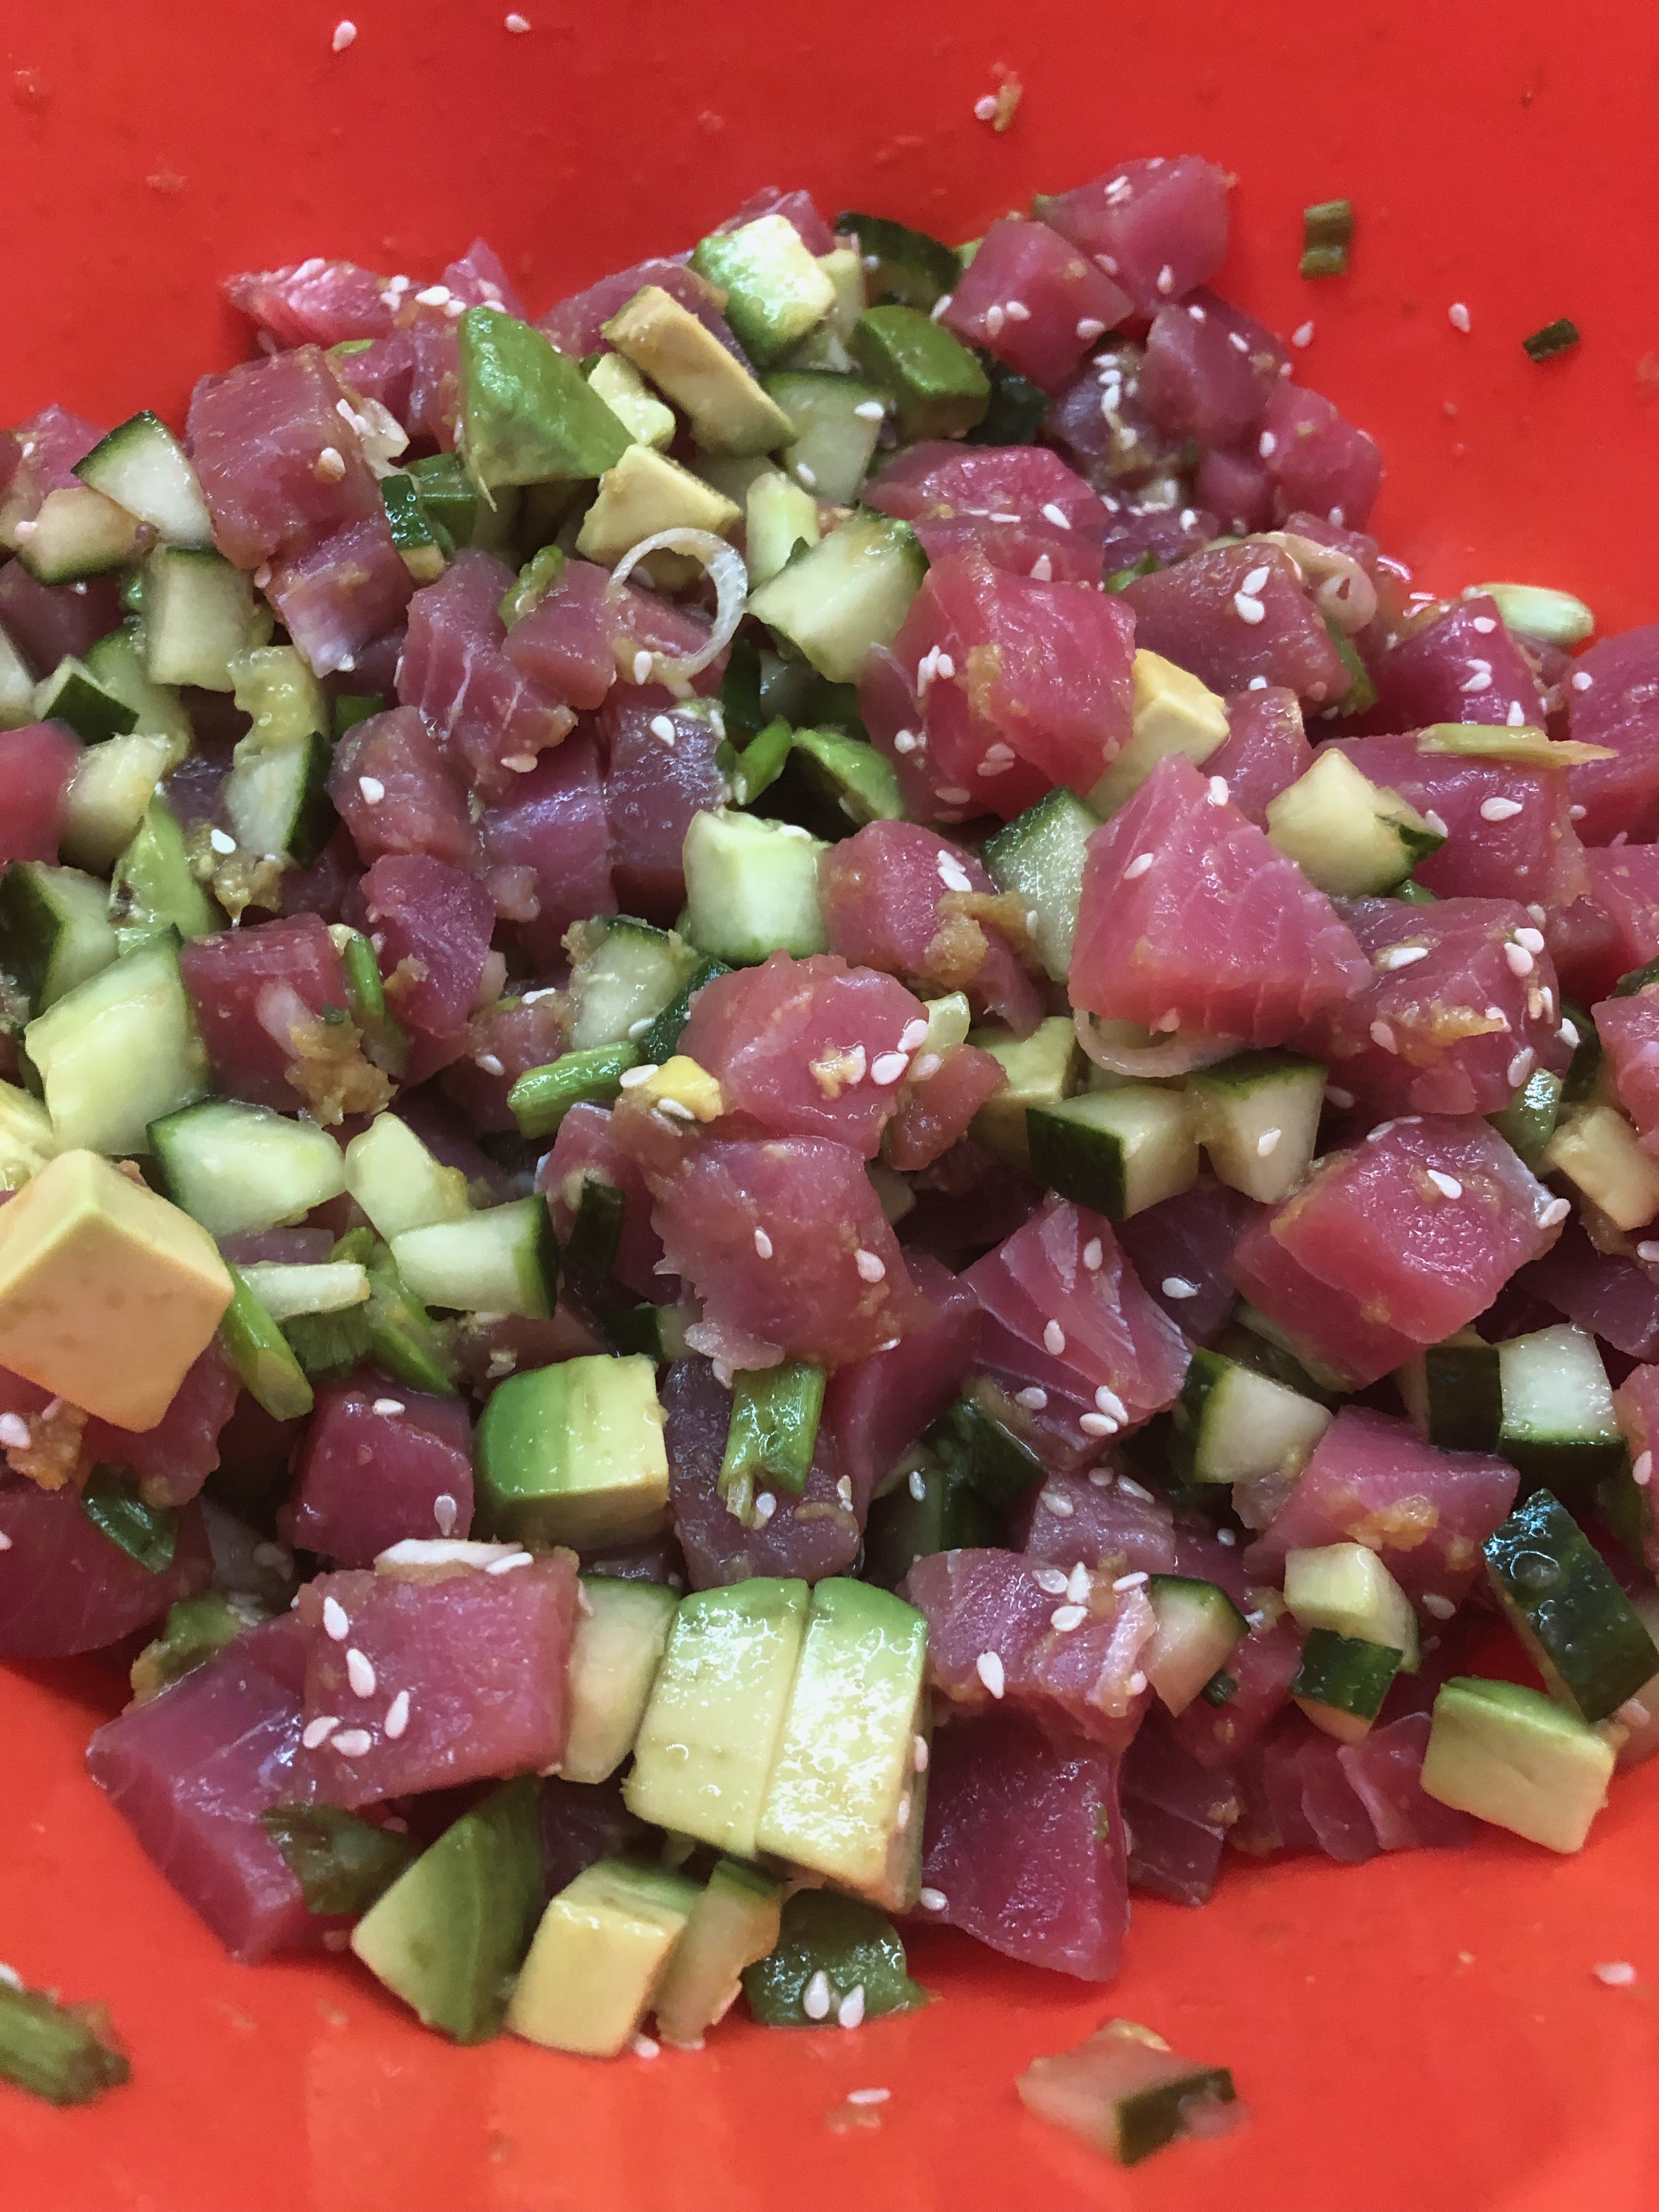
Using a very sharp knife cut the tuna into approximately 1/2″ cubes. Easier to do this if tuna is slightly frozen.

Place tuna in a large bowl and added the scallions, garlic, ginger, cucumber, cilantro, orange juice, ponzu or teriyaki (recipe below), sesame oil, honey or agave, wasabi paste and salt.

Gently stir everything together. Taste to see if more salt is needed. Transfer to serving dish.

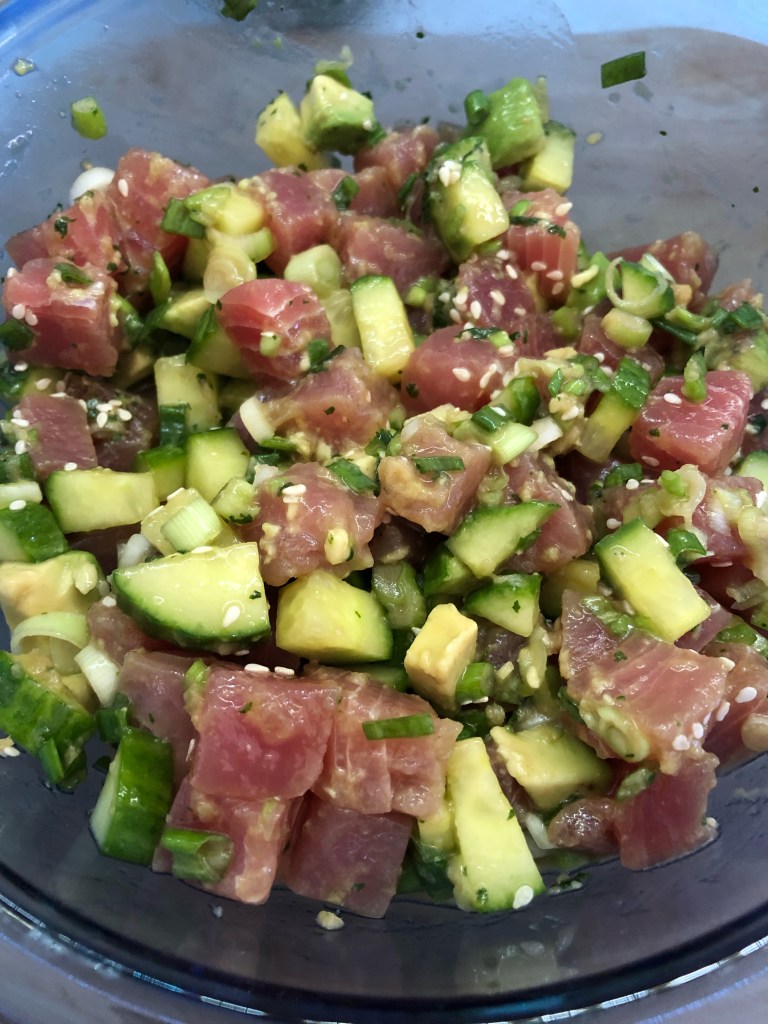
Top with chopped avocado and drizzle the lime juice over the avocado. Stir if you want and then sprinkle sesame seeds on top. Serve immediately.

Sesame Teiyaki Sauce (sugar free)

I usually double this recipe to always have some on hand. Also if you don’t like using sucralose use regular sugar.

1/2 Cup low-sodium soy sauce

2 TBS sucralose

1 tsp sesame oil

1 tsp fresh minced ginger (can use dried but the taste won’t be the same)

1 clove garlic, minced (can use garlic powder but fresh is best)

Whisk all ingredients together. Store in fridge. I store mine in a glass jar (like the ball/mason jars)

Sluggo approves!

Homemade Bagels Made Simple!

IMG_5577

This recipe is from Gina at Skinnytaste. I had made them once before and they were good but I used whole wheat flour. This time I made them with unbleached all-purpose flour and they came out so much better! Each recipe makes 4 bagels and for those following Weight Watchers and counting points, each bagel is only 3 Freestyle points! I put 2 tablespoons of greek style cream cheese for a total of 2 points, making the whole bagel 5 points! Amazing, since a normal bagel is 9-11 points, plain! So thank you to Skinnytaste for this delicious recipe! I used an “everything” seasoning (recipe to follow) on them but you can use whatever you like. 

These are really easy to make and have only 5 ingredients! I made mine in my Air Fryer and they came out great! I love my Air Fryer. I have a GoWise USA fryer in purple. But they can easily be made in the oven as well, they just take longer. Give it a try! You won’t be disappointed!

And please don’t forget to visit my other blog at Cruise Ship Recipes at Home!

INGREDIENTS:

1 cup unbleached all-purpose flour (you can use whole wheat or gluten-free if you want)

2 teaspoons baking powder (make sure it’s not expired)

3/4 teaspoon kosher salt

1 cup non-fat Greek yogurt ( I used Fage, but use whatever you like, just don’t use regular yogurt, it can get too sticky)

1 egg beaten (or egg white if you choose)

AIR FRYER DIRECTIONS:

  1. Preheat the air fryer to 325ºF and set for 11-12 minutes. (My machine only had 320 or 330 so I set it for 330)
  2. In a medium bowl combine the flour, baking powder and salt, mixing well. 
  3. Add the yogurt and mix with a fork until well combined. It should look like small crumbles. 
  4. Place the down on a lightly dusted work area and need it a bit until it is tacky but not sticky. About 15-20 turns, the dough should come off your hands easily.
  5. Divide the dough into four equal balls, rolling each ball into 3/4 inch thick ropes and join the ends to make the bagel shape.
  6. Brush the tops with the beaten egg and coat the top and bottom with your seasonings.
  7. Once the air fryer is heated, spray a little cooking spray on bottom of pan and transfer the bagels in batches but don’t overcrowd. I put 3 in at a time. If I had put all 4 in they would have been too crowded.
  8. Bake/Fry for 11-12 minutes. I put mine in for 12 minutes, 11 was good but the dough inside was still a little tacky. So 12 minutes worked for me. They should be golden brown. There is no need to turn them over either.
  9. Let cool at least 10 minutes or more before cutting, they will firm up when cooled.

OVEN DIRECTIONS:

  1. Preheat oven to 375ºF. Put parchment paper on a baking sheet and spray with oil to avoid sticking. (you can also use a silpat if you have one)
  2. Follow steps 2-6 as above.
  3. Bake on the top rack of the oven for 25 minutes. Let cool at least 10 minutes before cutting. 

Makes 4 bagels

EVERYTHING BAGEL SEASONING

Ingredients:

1/4 cup sesame seeds

1/4 cup poppy seeds (If using fine poppy seeds use only 1/8 cup)

3 tablespoons dried onion flakes

3 tablespoons dried garlic flakes (hard to find so I ordered on Amazon)

2 tablespoons coarse sea salt

DIRECTIONS:

Mix everything together and store in an airtight container.

Makes 1 cup


Coconut Garlic Shrimp, Asparagus & Tomato Pasta

IMG_4233

Well it’s been a long week since Hurricane Irma slammed into Florida & the Caribbean and things are slowly, finally settling back to some kind of normalcy. This includes making a new dish for dinner. After replacing 75% of the contents of my freezer and refrigerator because of no power I can say with a smile, I’m back! I’ve been wanting to make this recipe for quite some time. The original recipe that I adapted this from (Garlic Shrimp in Coconut Milk, Tomatoes and Cilantro) is from Gina Homolka at Skinnytaste. Please check her recipe out as well.

The original recipe from Gina was more of a stew and could be served over rice. I added more garlic and served it over pasta instead. I also added asparagus since I had some in the fridge that had to be used or I would lose it. I may try it with peas instead next time or possibly broccoli! And for those of you who know me, know I really do NOT like peppers (green, red, yellow….) jalapeno yes, but sweet peppers no. This recipe has red peppers in it and I can barely taste them. I did use the small rainbow peppers (the red ones) and they aren’t as strong-tasting so that’s probably why I liked them.

So how did the recipe turn out? Let’s just say, my husband and I could not stop eating it! It was incredible! I can’t wait to have it as leftovers again! It’s a very easy recipe to make and I will be making it again for sure. The only thing I might do next time is add another can of the coconut milk so it has more sauce for the pasta. Other than that it’s a home run! It’s not a heavy meal, the sauce is light, yet it is a very filling dish. Hope you enjoy it!

IMG_4235

INGREDIENTS:

1 1/4 lb uncooked peeled and deveined jumbo shrimp (I used (2) 12oz. bags of frozen shrimp from Aldi)

1 tsp olive oil

1 pound of asparagus sliced into small pieces

1 pound cooked pasta of your choice

1 small red pepper or 4 large red peppers from a bag of mini rainbow peppers, diced

4 scallions, thinly sliced, separating the whites and greens

1/2 cup chopped fresh cilantro (I used about 1 tablespoon of dried since I didn’t have fresh)

6-8 cloves minced garlic

1/2 teaspoon kosher salt

1 teaspoon crushed red pepper flakes

1 can (14.5oz) diced tomatoes of choice

1 can (13-14oz) light coconut milk. (I used Trader Joe’s organic reduced fat coconut milk)

1/2 of a lime juiced

DIRECTIONS:

  1. In a medium saucepan heat the olive oil and sauté the red pepper until soft, about 4 minutes.
  2. Add the white parts of the scallions, ¼ cup of the fresh cilantro (or the 1 tbsp of dried), the garlic and red pepper flakes. Cook for about a minute or so until well blended.
  3. Add the tomatoes, coconut milk and ¼ tsp of salt. Stir well and bring to a boil. Once it boils, cover the pot and simmer for about 10-15 minutes until the sauce thickens a bit.
  4. Meanwhile cook the pasta to just al-dente, drain and put back into the pot.
  5. Add the chopped asparagus to the tomato coconut milk mixture and cook for 1-2 minutes until it begins to soften a little.
  6. Add the shrimp to the same mixture and cook for about 5-6 minutes until the shrimp is opaque. Add the lime juice.
  7. Pour all of the shrimp mixture into the pot with the pasta and mix well. Let it simmer for just a minute or so to get everything mixed.
  8. Serve. Top with the green part of the scallions and rest of fresh cilantro if using fresh. We also like to add a little parmesan cheese on top as well.

Serves 4-6

IMG_4234

Quinoa Shrimp Scampi

This recipe started out because I looked in my pantry and saw that I have just way too much quinoa in there. I have plain, red, tri-color and then I just bought a couple more packages at Home Goods! So I decided I needed to start using it more. The quinoa I used in this recipe was an Italian flavored one. I bought this container of Pereg quinoa in Home Goods for $3.99 and I used about half of the container in this recipe, about 1 cup. This brand comes in all kinds of flavors which is pretty cool so you can make whatever you’re in the mood for! I also bought a spinach version and a mushroom version. Just follow the directions on the package and you’re good to go! I also substituted the water with chicken broth, which gives it so much more flavor. A vegetable broth would work great too! But if that’s not something you would want to do then just use water. 

This is a quick meal you can throw together in under 30 minutes for sure. Great for after work when you want something nutritious and delicious! This was a nice filling and satisfying meal for two of us but if you want it can serve 4 as a side dish.

INGREDIENTS:

  • Pereg “All’ Italiana” quinoa (Use 1 cup and cook according to package)
  • 12-16 ounces uncooked extra large-jumbo shrimp, peeled and deveined (no tails on unless you like that sort of thing- I do not)
  • 3-4 cloves garlic minced
  • 1/2 large tomato chopped
  • 1 tablespoon butter
  • 1 tablespoon EVOO
  • 1/4 cup fresh lemon juice
  • 1 tsp dried basil
  • 1 tsp dried parsley
  • 1 tsp dried oregano
  • Parmesan cheese for topping

DIRECTIONS:

  1. Cook quinoa according to directions on package. When it is done, keep it on low to stay warm.
  2. Add the oil and butter to a medium skillet and saute the garlic till soft, just a few minutes.
  3. Add the shrimp to the skillet and cook on medium heat. A couple of minutes on each side until shrimp turns pink is good. Do NOT overcook.
  4. Add the lemon juice and herbs and mix well.
  5. Add the chopped tomato to the quinoa mixture.
  6. Divide up the quinoa into flat bowls and top evenly with the shrimp mixture. Make sure the delicious juices are evenly distributed as well.
  7. Serve with some parmesan cheese on top if you like!


Zucchini Chicken Enchiladas

This slideshow requires JavaScript.

I made this recipe last night for dinner for the first time. I LOVED it! It made quite a bit too. I think I got about 15-17 pieces. I found this recipe on Facebook Zucchini Enchiladas. I, of course, changed it up a bit to what I found worked better for me.

One of the toughest parts of the recipe was slicing the zucchini into the thin slices needed. I had a small Y-shaped peeler but it was too small. So I improvised and used my Pampered Chef cheese slicer and it worked great! Though I have to say it was tedious. The original recipe called for 4 large zucchini, I had 3 and it worked fine. I also didn’t have quite enough enchilada sauce so I took a small can of green chilis and added it to the amount of sauce I was supposed to add to the top of the enchiladas and pureed it. Worked just fine and tasted great.

I thought this was a great change from the carb-loaded tortillas. Don’t get me wrong, I love my tortillas but this was a nice variation. I have lots left over for lunch and I froze the rest for another day.

INGREDIENTS:

  • 1 tbsp extra-virgin olive oil
  • 1 large onion, chopped (I used a sweet onion)
  • kosher salt
  • 2-4 cloves garlic, minced (yes I used 4 of course)
  • 2 tsp. ground cumin
  • 2 tsp. chili powder
  • small can green chilis
  • 3 cups shredded cooked chicken (I used 3 large boneless breasts)
  • 1 1/3 cup red enchilada sauce
  • 3-4 large zucchini, halved lengthwise
  • 1 cup shredded Monterey jack cheese
  • 1 cup shredded cheddar cheese
  • sour cream for topping
  • fresh cilantro for garnish

DIRECTIONS:

  1. Preheat oven to 350°F. In a large skillet heat oil over medium heat.
  2. Add the chopped onion and season with salt. Cook for about 5 minutes or until soft.
  3. Add the garlic, cumin and chili powder and stir until all combined.
  4. Add the chicken and 1 cup of the enchilada sauce, mixing until well combined. It should be a little saucy.
  5. Puree the small can of green chilis with the remaining enchilada sauce and set aside.
  6. On a cutting board use a Y-shaped vegetable peeler if you have one wide enough for the zucchini. Slice very thin.
  7. Layout 3 slices, overlapping slightly and add a spoonful of the chicken mixture (about 1/4-1/3 cup) at the top. Carefully roll and place into a casserole dish, seam side down. Repeat till finished. (I used two casserole dishes)
  8. Spoon the green chili/enchilada sauce mixture over the enchiladas and sprinkle with the cheese.
  9. Bake until cheese is melted, about 20-30 minutes.
  10. Garnish with fresh cilantro and sour cream. Careful they are very hot because of the water content in the zucchini.
  11. ENJOY!

Refreshing Cucumber Salsa

2015-06-07 12.38.50

I received this recipe in my email this weekend and just had to try it out. It was originally from a Taste of Home reader from North Dakota (Crisp Cucumber Salsa) and the only thing I changed was the type of cucumber. I used the english/hothouse cucumber and didn’t peel it. The original recipe called for peeling the cucumber, which I would only do if I used a regular variety. The english style holds up better and stays firmer.

I made the recipe for a couple of friends and it was a huge success. So easy and healthy as well! The original recipe called for serving immediately but I think letting it chill for a bit would be better. I will definitely be making this quite a bit this summer!

A refreshing, light, crunchy salsa/relish. It would easily go on burgers, hot dogs, chicken or fish as well! I might even try using greek yogurt instead of the sour cream next time! If anyone tries it that way let me know!

Ingredients:

2 cups finely chopped, seeded cucumber (I used english cucumber)

1/2 cup finely chopped seeded tomato (1 medium plum tomato)

1/4 cup chopped red onion

2 TBS minced fresh parsley

1 jalapeño pepper, seeded and chopped

4-1/2 tsp minced fresh cilantro

1 clove garlic, minced

1/4 cup light sour cream

1-1/2 tsp lemon juice

1-1/2 tsp lime juice

1/4 tsp ground cumin

1/4 tsp seasoned salt

Baked tortilla chip scoops

Instructions:

1: In a medium bowl, combine the cucumber, tomato, red onion, parsley, jalapeño pepper, cilantro and garlic.

2: in a small bowl add the sour cream, lemon juice, lime juice, cumin and seasoned salt.

3: Pour creamy mixture over the cucumber mixture and mix gently. Coating all ingredients.

4: It can be served immediately but is better chilled for about 15-30 minutes before serving. Stir before serving.

Calories: 16 per 1/4 cup (without chips)

Fat: 1g

Sodium: 44mg

Carbs: 2g

Protein: 1g

Summer Couscous Salad

I made this salad again for the July 4th holiday and thought it would be good to repost! Once again it was a hit! Quick, easy, refreshing and delicious!!

*********************************************************************************

It’s been a while but here is a new recipe. I made this dish yesterday to bring to a friend’s for a barbecue. She said to bring a side. Turns out she made almost the same exact salad! Very funny, but they had a few different ingredients so it was cool. (Hers had chopped red pepper, and everyone who knows me knows I would NEVER put sweet peppers in anything!)She also didn’t have the carrots or tomatoes.

I just threw this together quickly and it can totally be changed to what you like. It’s your choice!

This was a very fast and easy salad to make. It’s a nice change from the usual heavy ‘pasta’ type salads. Mostly veggies also so how can it be bad? Enjoy.

2013-06-22 13.36.20

INGREDIENTS:

1 ½ cups pearl couscous (cooked according to package directions) I also used chicken broth instead of water

1 can corn kernel, drained and rinsed

1 can black beans, drained and rinsed

¼-½ of an english cucumber chopped small (If you use a regular cucumber, remove the seeds and peel)

1 stalk celery sliced/chopped

1 carrot grated or chopped

cherry tomatoes/halved (I used about 20 or so)

¼ cup red onion, finely chopped

1 teaspoon dried dill

½- 1 teaspoon garlic powder (approximately)

olive oil

salt and pepper to taste

DIRECTIONS:

Put all ingredients in a large bowl (except for olive oil). Mix thoroughly. Then slowly add some olive oil to make it smooth and silky. I think I used a couple of tablespoons. 

Chill several hours and serve.

Italian Spaghetti Squash Quiche

Last night I decided I wanted to make something a little different for dinner. I hadn’t made a Quiche in a while so I thought about doing that. I also had a nice spaghetti squash sitting on my counter and wanted to use it soon. Good thing I decided on the spaghetti squash! When I cut it open a few seeds inside had sprouted! And we’re talking a good 3-4 inches! Crazy! But I also decided to make a Quiche. I combined the two. I just threw stuff together that I had in the refrigerator and voilà! A new delicious taste for dinner! (Or breakfast the next day!)
 I only used half of the squash and it was plenty. And to make it all worth while, ¼ of the Quiche is only 272 calories! Bonus!
 This recipe will make about 8 pieces We usually each have ¼ of the Quiche as a serving though. Oh and did I mention, it’s crustless!

2013-03-13 21.26.07
Ingredients:
½ of a spaghetti squash cooked and scraped out into a bowl. (Cook any way you are used to. I microwave it, cut side down in a shallow casserole with some water for about 10-15 minutes until soft)
1 cup fat-free half-and-half
3 eggs (You can use egg beaters if you want), beaten
1 cup shredded low-fat part-skim mozzarella cheese
1 chicken sausage (any kind you like is fine. I used a Casual Gourmet tomato and mozzarella one), cut into small pieces
2-3 fresh basil leaves, minced
½ teaspoon fennel seed
1 head roasted garlic, chopped (I had it in the fridge, garlic powder will be good too if you want)
Salt & pepper to taste
Directions:
1. Mix all ingredients in a large bowl
 2. Pour ingredients into a casserole dish or any type of baking dish you have. An actual Quiche pan may be too small. Spray the pan with cooking spray.
3. Bake at 375 for about 45 minutes. Let sit about 10 minutes when done. It will rest this way.

Baked Chicken Salad Egg Rolls!

This recipe I just came up with tonight. Remember I’m obsessed with wonton wrappers and these are the big ones, the egg roll wrappers. Well I decided to make use of the leftover chicken breast I had in the fridge and came up with these gems. So easy to make. Baked not fried.

2013-03-12 21.25.16

The ingredients included: 1 chicken breast that had been roasted on the bone, removed and chopped up. About 2 cups chopped chicken. Julienned carrots, chopped celery (1 stem), 1 tablespoon minced red onion, garlic powder to taste, ¾ cup light sour cream and 2 blue cheese Laughing Cow wedges (softened). Also added about 3 ounces shredded sharp cheddar cheese to the mixture.

Mix all together. The recipe made 10 egg rolls. I buy the egg roll wrappers in the produce department of my supermarket. Walmart also sells them in their produce department. Look in the Asian food section. I laid a few carrots sliver in the center and then put about ½ cup of the chicken salad on top. Wet the edges of the wrapper and fold sides over, then bring bottom over the top and roll. Seal the edges with a bit of water.

I sprayed them with cooking spray and placed on a baking sheet. Baked for about 20-30 minutes at 400º, turning after 10 minutes till golden brown! That’s it!!

2013-03-12 21.21.06 2013-03-12 21.21.13 2013-03-12 21.22.06

The sauce I served with it was just light sour cream and Tabasco Buffalo sauce and a teaspoon of agave for sweetness.  Everything was delicious. I thought there would be leftovers. Nope! All gone!

Cauliflower Crust Pizza

As promised, here is a recipe I made for pizza with a cauliflower crust. I was at a Weight Watchers meeting a couple of weeks ago and I heard someone mention making a pizza crust with cauliflower. I was intrigued! My husband is doing his Atkins thing, again,  so he’s avoiding bread like the plague. I however still want my bread! But to be nice I researched the alternatives using cauliflower. Now I will say, it’s not like normal pizza crust. It’s not bread! But, it is still really good! I was pleasantly surprised at the outcome and my husband loved it. So I guess it was a success. I have made it twice now so it’s a keeper for sure.  And for those of you out there crinkling up your noses, it doesn’t taste like cauliflower! Honest! It is a little soft but hardens a bit when it starts to cool out of the oven. 

Made with crumbled chicken sausage

Made with crumbled chicken sausage & cheddar cheese topping

What I really like about this is you can put anything you want on it to make it a pizza. I used chicken sausage, some tomato sauce and some cheese. Incredibly delicious! So be daring, make some cauliflower crust pizza today! It’s worth it! Honestly the hardest part is shredding/chopping the cauliflower. Don’t be scared. It’s a taste sensation!

Crust before baking

Crust before baking

Ingredients:

2-3 Cups shredded or finely chopped cauliflower (I used my shredder attachment on the food processor)

2-3 large eggs, if they are on the small size of large, use 3, beaten

2 cups shredded cheddar cheese

1½ teaspoon fennel (this really makes a difference, I didn’t use it the 1st time but did the 2nd time, so invest in a jar)

1 tablespoon dried oregano

2 tablespoons dried parsley

1 teaspoon garlic powder (more if you desire!)

Directions:

1: Finely chop, shred or rice cauliflower until you have 2-3 cups of cauliflower. Add the eggs and shredded cheese.

2. Add the spices and mix well.

3. Press the mixture into a greased pizza pan or cookie sheet. (Don’t worry if it doesn’t fill up the entire sheet, mine didn’t the first time I made it) First time I used a cookie sheet. Second time I used a stoneware baking sheet. I think the cookie sheet worked better. It’s up to you though.

(Make sure it’s as flat as you can get it with no holes showing through.)

4. Bake at 450º for about 20 minutes. If it is starting to brown and crisp on the edges it’s good. You can cook a little longer if you want.

5. Remove from oven and add desired toppings. Be careful with sauce, don’t over-sauce as it will make the crust too soggy. I used about ½ cup sauce and spread it thin over the crust. I topped it with chopped chicken sausage and part-skim mozzarella. Use whatever you want!!

6. Bake until brown and cheese is bubbly! (about another 5-10 minutes, just keep an eye on it)

Makes about 8 servings

Made with sliced chicken sausage & mozzarella cheese

Made with sliced chicken sausage & mozzarella cheese

1 2 8
Cruise Ship Recipes at Home

How do I Make That?

Rachael Ray

It's Not Just Popcorn!

Joanne Eats Well With Others

It's Not Just Popcorn!

Garlic Girl

It's Not Just Popcorn!

BuzzFeed - Tasty

It's Not Just Popcorn!

An Edible Mosaic™

It's Not Just Popcorn!

StephenKing.com - Latest News

It's Not Just Popcorn!

Food52

It's Not Just Popcorn!

Big Bear's Wife

It's Not Just Popcorn!

The Weekend Gourmet

It's Not Just Popcorn!

Skinnytaste

It's Not Just Popcorn!

What's Cooking at the Genua's?

It's Not Just Popcorn!

Simply Recipes

It's Not Just Popcorn!

It's Not Just Popcorn!

Homemade In The Kitchen

Small Batch Recipes and Recipes For Two

overdeepblueseas

OVER DEEP BLUE SEAS BLOG @ WordPress.com

Sluggo's Escapades

What's Sluggo up to today?

RavieNomNoms

A Girl, Her Blog, and Lots of Food Pictures!